 - only the Administrator can access the Tools function. The control of the printing of Social Security Numbers is maintained here. Only the system administrator can access these powerful control functions.
The System Settings function is a control center for various configuration settings.
Frequency: This process can be run at anytime.
 - only the Administrator can access the Tools function. The control of the printing of Social Security Numbers is maintained here. Only the system administrator can access these powerful control functions.
 - save time by setting the Search Cursor Position to the choice most used to find debtors: SSN, Name or Account Number
 - To see a selected list of expired debts, run an Expiration Report. This will assist in determining what dates need to be changed.
 - this powerful function has one option that will change ALL debts to one Expiration Date. This cannot be un-done so be sure if you use that option it is what you intend to do. You may have a large range of Expiration Dates as debts were submitted to the Clearinghouse over a period of time.
1. From the Main Menu click Tools:

2. The Tools menu options:
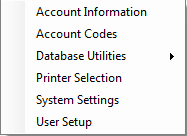
3. Move the mouse over System Settings and click this option:
![]()
4. The current settings appear:
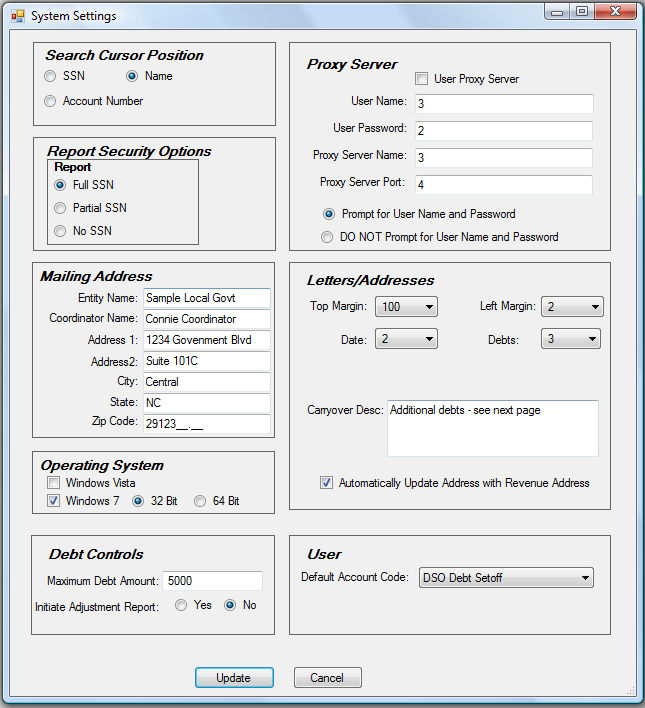
4. Modify any desired Configuration Settings:
A. Search Cursor Position - defaults where the cursor is positioned on the Search within the Debtor Information screen. Set it to the option that is most used to search for debtors. This option can be changed as often as necessary. A debtor can still be searched by any of the three options by will have to use the TAB key or click with the mouse to select:

Click the
to choose where the cursor/mouse location defaults to in the Debtor Information Search
- SSN - sets the cursor/mouse position in the SEARCH of Debtor Information to SSN
- Name - sets the cursor/mouse position in the SEARCH of Debtor Information to Last Name
- Account Number - sets the cursor/mouse position in the SEARCH of Debtor Information to Account Number
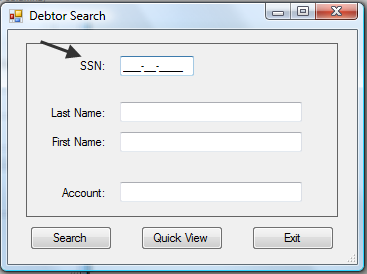
An example of a selecting SSN and accessing the Debtor Information Search:
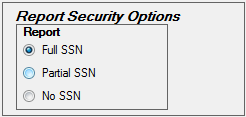
B. Report Security Options - defaults to the format of printing of SSNs.
 p
p
Click the
to choose the format that SSNs appear on any report until changed:
- Full SSN - prints the entire nine digit SSN on the letter in the format: 123-45-6789 (NO SECURITY)
- Partial SSN - prints the last four digits only of the SSN in the format: ***-**-6789 (MEDIUM SECURITY)
- No SSN - prints none of the SSN in the format: ***-**-**** (HIGH SECURITY)
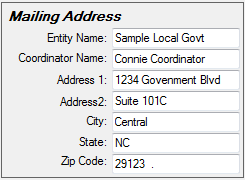
C. Mailing Address - the default name and address used for Notification Letters . Complete the information if all letters will refer debtors to just one name and address .
D. Operating System - the operating system if not Microsoft Office XP. Windows Vista and 7 require some different file transfer settings. Windows 7 64-bit also requires a special file transfer different than Vista and Windows 7 32-bit.

Click the
to choose the Operating System of any computers that are not Microsoft XP.
- Windows Vista - if one or more computers have Vista
- Windows 7 - if one or more computers have Vista
Click the
to choose the type of Windows 7, 32-bit or 64-bit.
- 32 Bit - if one or more computers have Windows 7 32-bit
- 64 Bit - if one or more computers have Windows 7 64-bit (overrules the 32-bit, use this one if any computers are 64-bit)
E. Debt Controls - settings for debts that are entered and edited
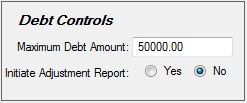
- Enter the maximum debt amount that should be entered for a debt. A warning prompt will appear if a debt amount being entered is more than this Maximum Debt Amount. This protects submitting someone with a larger debt than possible, such as inadvertently entering an account number or SSN in the debt amount field.
Click the
to choose if an Adjustment Report will print after entering one or more debts.
- Yes- automatically prints an Adjustment Report when exiting the Debtor Information screen after one or more debts have been entered
- No - will not automatically print an Adjustment Report after exiting the Debtor Information screen after one or more debts have been entered. Note - an Adjustment Report can be manually selected at any time by executing the Adjustment Report.
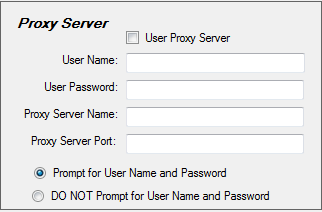
F. Proxy Server Options: - allows the Transmit menu to function ONLY if you go through an internal Proxy Server. These controls are NOT normally implemented by I.T. departments. However, if a local government is using a Proxy Server, these settings must be done in order to do the Transmit functions. The local government I.T. group should contact the Clearinghouse to configure and test.
G. Letters/Addresses:- configure the Notification Letters.
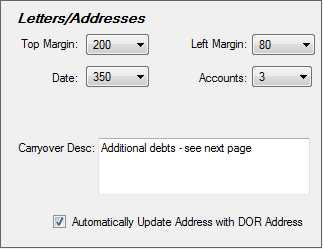
- Top Margin- [OPTIONAL] click the
and select a number for a top margin for a top-side letterhead. This is not a line number but a distance in pixels. Select the appropriate number for the desired letterhead size:
- 50 - 1/2 inch top-side letterhead
- 100 - 1 inch top-side letterhead
- 150 - 1 1/2 inch top-side letterhead
- 200 - 2 inch top-side letterhead
- Left Margin - [OPTIONAL] click the
and select a number for a left margin for a left-side letterhead. This is not a line number but a distance in pixels. Select the appropriate number for the desired letterhead size:
- 50 - 1/2 inch left-side letterhead
- 100 - 1 inch left-side letterhead
- 150 - 1 1/2 inch left-side letterhead
- 200 - 2 inch left-side letterhead
- Date - [OPTIONAL] click the
and select a number for a left margin for the date that appears on the letter. This is not a line number but a distance in pixels. Select the appropriate number for the desired letterhead size:
- 50 - 1/2 inch left-side letterhead
- 100 - 1 inch left-side letterhead
- 150 - 1 1/2 inch left-side letterhead
- 200 - 2 inch left-side letterhead
- 375 - near center of the page
- Debts: click the
and select a number from 1 to 6 of the number of different debts that appear in the debt section of the letter. There is a limit, if not the letter content would overflow to a second page. This method of configuration causes the overflow debts to print on the second page.
- Carryover Desc: enter the description that will appear at the end of the debt section of the letter if there are still more debts to be listed beyond the number in the Accounts option . For example, if the Accounts was set to 3 and the debtor has 5 debts, the wording in this Carryover Desc. will print after the 3 debts and the other two debts will appear on the next page.
- Automatically Update Address with Revenue Address
- Click the
to automatically update all addresses from the Department of Revenue for an Import Setoffs .
 to save the System Settings changes
 to abort and return back to the Main Menu